If you’ve got plans to visit Canada, don’t forget to bring your camera along. The cities of this northern nation are beautiful at any time of the year, so we’re sharing some photography tips to ensure that you get the best shot.
And who better to ask them the experts at Passion Passport? Travel photography is their forte, and lucky for us, they were happy to share some tips and tricks to help you create some beautiful digital memories.
Travel by Train
Travelling by train is easily the most scenic way go to. While you’re rolling through Canada’s wilderness, experiment with your camera settings to get the best results.
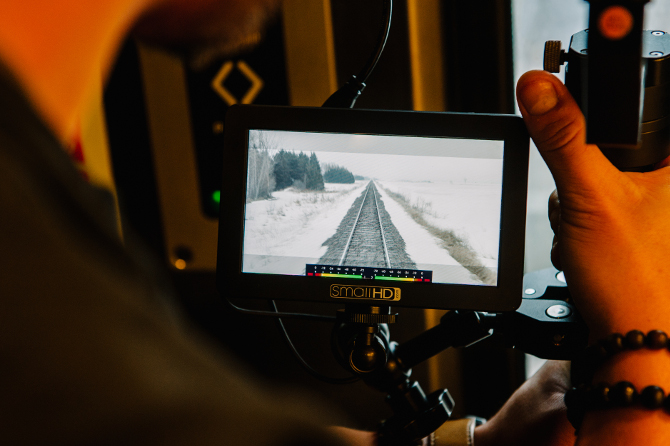
If you have a camera that allows for it, adjust the ISO (the sensitivity of the camera to light) according to the lighting and speed of the train — a setting of 100 or 200 is likely sufficient and will keep the photo less grainy. Because you’re on a moving vehicle, you’ll want to adjust the speed of the shutter accordingly, or put your camera into shutter-priority mode so that your shots aren’t blurry. Anything from 1/300 of a second to 1/1600 should keep the photos sharp.
Note that these settings are good for daytime photos. At night, you’ll need to adjust either the ISO or the shutter or else you’ll end up with some very dark or blurry images.
Aim your lens as close to the glass window as you can to avoid reflections — or, use them to your advantage to capture a variety of elements in a single snap. It’ll certainly add visual interest and a unique sense of place to your photos.
Snap Architecture and Street Art
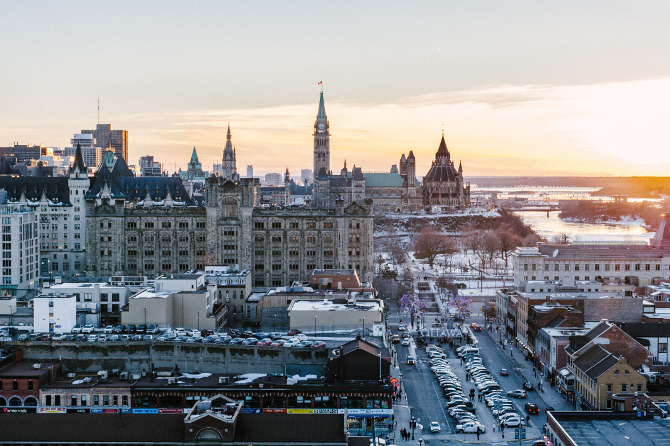
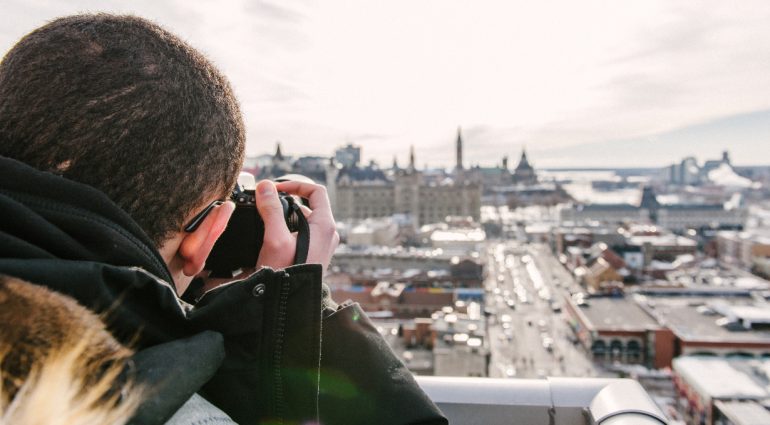
Canada is known for its unique and impressive architecture — from the sleek and modern buildings of Vancouver to the towering Gothic buildings of Ottawa, Canadian cities are truly a photographer’s paradise. While visiting Ottawa, the Passion Passport crew were able to snap shots of the skyline from the top of the Andaz hotel. It was the perfect viewpoint from which to photograph and observe the city and the ebbs and flows of its traffic.
As you head into the city, be sure to photograph the skyline from afar. It’s a great visual introduction to the place and helps show the scale of the metropolis against its surrounding environment. For these types of shots, you’ll need to utilize a very wide-angle lens, preferably 10-30 mm. This will ensure that you’re able to capture the details of the buildings, their scale, and the land.
Once you arrive inside the boundaries of the city, you can continue to use a wide angle lens or you can opt to switch to a prime (fixed) lens.
To photograph architecture, experiment with angle — stand under the building and photograph straight up to capture intricate stonework detail or statues. Train your lens up to photograph impressive ceilings or stained glass windows. Adjust your settings based on the amount of available daylight — in natural light, you should be shooting at ISO 100-200 and then adjust the size of the aperture (f-stop) to the look you’d like to achieve. Experiment with a few different settings to see what you get!
To highlight a single element, like a statue, consider using a ‘low’ f-stop value (f/1.8, 2) to create a shallow depth of field and a central focus with a blurred background. To capture many elements in focus, attempt a deep depth of field with a ‘large’ f-stop value (f/9, f/11). If you’re unsure of what effect you’d like to achieve, experiment with different f/stops — your camera will take care of the shutter speed.
When photographing in a city, light is of the utmost importance. Try to capture your images in the very best light — either during early morning or late afternoon. This will prevent your images from the harsh shadows that occur at midday.
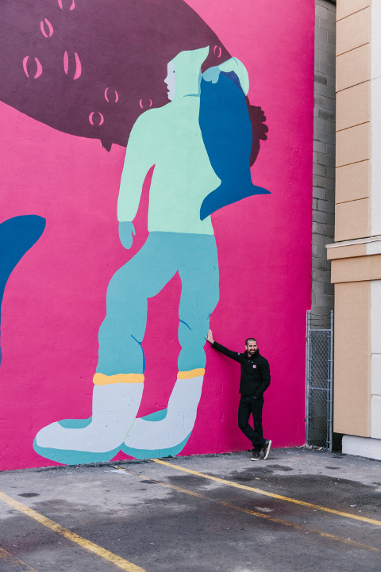
There’s no better way to get acquainted with a new city than to explore its streets — and in a growing number of Canadian cities well-trodden thoroughfares are splashed with color. During their Ottawa visit, Passion Passport discovered a host of quirky murals that added character and interest to otherwise normal street scenes.
To capture these murals, keep your wide angle lens handy! You likely won’t have much room to back up, so a broad view will benefit your shot. Choose an aperture setting of around f/8 — if the street is shadier, you’ll likely need to choose a ‘smaller’ f-stop value (i.e. f/4), but do experiment until you get the desired image.
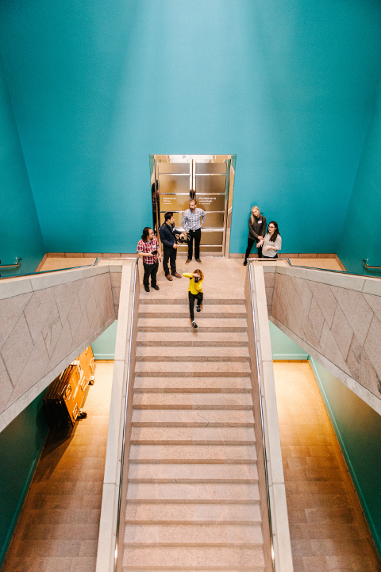
Photograph Pedestrians
While it can be a bit nerve-racking to train your camera on living subjects, street photography is some of the most compelling in order to tell a story about a particular place.
It’s helpful to find a thoroughfare where you’d feel comfortable photographing people walking to and fro, shopping, or just enjoying a coffee and a pastry at a local cafe. Wherever you choose, be sure to stay out of the way of oncoming traffic!
To photograph pedestrians on the street, be sure that your camera settings are set at 100-200 ISO (an optimal reading for natural light), and at about f/8 in aperture-priority mode. From there, your camera will compensate for moving pedestrians with an automatically generated shutter speed.

You can also take your street shots a step further and photograph long exposure. For this you’ll need a tripod or another object to steady your camera. Peer through the viewfinder and set up your scene — make sure you’re framing the image in an intriguing way and set your camera to manual mode — don’t worry if this is unchartered territory for you!
You’ll likely have to adjust the ISO (100-200 for daytime photography) and the aperture (try f/11 to start, and adjust as necessary — ‘lowering’ the f/stop to a setting like f/4 will make the image brighter and a ‘higher’ f/stop, like f/16 will make the image darker). As a rule of thumb, you’ll set your shutter speed to 15s to snap your first test image. If you get the desired result, keep photographing! If not, lengthen the exposure time by making your shutter speed longer (try 20, 25, or 30 seconds) and choose a ‘larger’ f/stop value (f/16, f/22) to avoid overexposure.
Wherever you go and whatever you choose to take pictures of, remember to relax and enjoy your surroundings. The more you practice, the easier it’ll get to set up and snap the perfect shot. Pictures are a great reminder of the experience – so make sure to put the camera down every once in a while and take it all in.


